
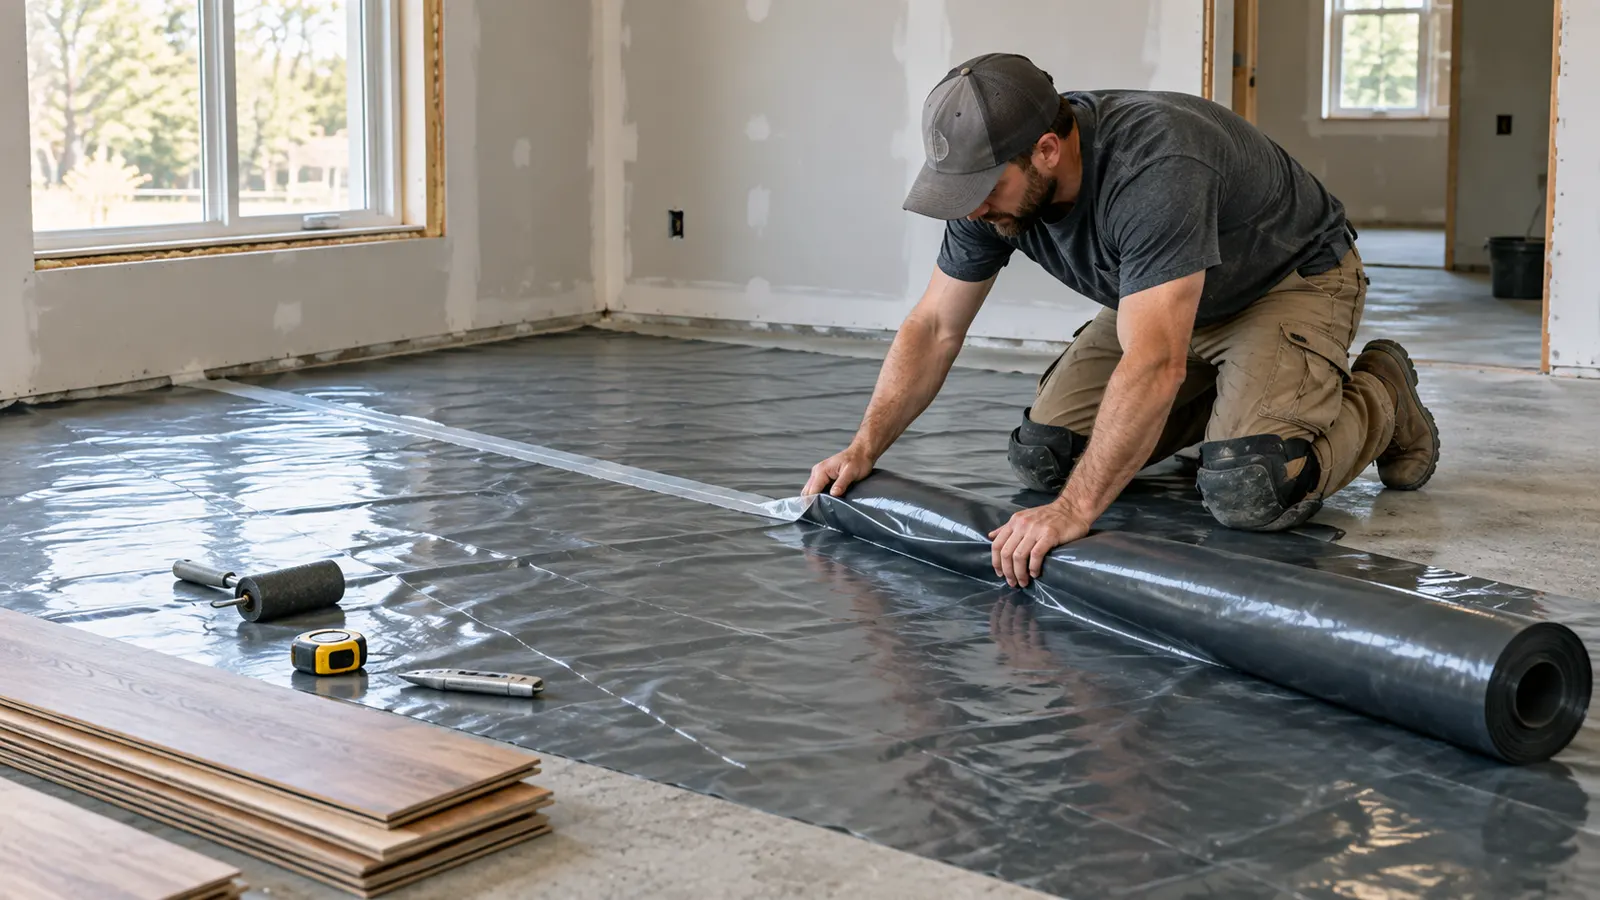
A moisture barrier for flooring helps control moisture moving from the subfloor into the finished floor. It is especially important over concrete slabs, basements, and ground-level rooms, but the right solution depends on the subfloor, flooring type, installation method, and the moisture level of the surface.
There is no single barrier product that works for every flooring project. A polyethylene sheet, an underlayment with an attached vapor barrier, and a liquid-applied membrane are different systems, and using the wrong one can create installation, warranty, or long-term moisture problems.
Quick Answer
If you are installing flooring over a concrete slab, you may need a moisture barrier or an approved underlayment with moisture protection. However, you should not automatically add a separate plastic sheet under every type of flooring, because some vinyl products do not require additional underlayment and some flooring systems have specific compatibility requirements.
| Project situation | General direction | What to verify |
|---|---|---|
| Concrete slab with laminate | Use an approved underlayment or vapor barrier system | Whether the flooring already includes an attached pad or barrier |
| Concrete slab with vinyl or LVP | Follow the flooring manufacturer’s instructions | Whether extra underlayment is allowed or required |
| Concrete slab with hardwood or engineered wood | Test the slab and use an approved membrane or adhesive system | Moisture limits and installation method |
| Wood subfloor | Do not add generic plastic automatically | Flooring instructions and subfloor construction |
| Damp or wet concrete | Stop and identify the moisture source first | Whether the problem is vapor, liquid water, or hydrostatic pressure |
The most important rule is simple: choose the barrier as part of the complete flooring system, not as an isolated product. The flooring manufacturer’s installation instructions should take priority over a general recommendation found online.
What Is a Moisture Barrier for Flooring?
A moisture barrier is a layer or coating designed to reduce the movement of moisture from a subfloor into the finished flooring. In flooring projects, the term may refer to polyethylene film, an underlayment with an integrated vapor barrier, a liquid-applied membrane, or another product specifically rated for use beneath flooring.
The terms moisture barrier, vapor barrier, vapor retarder, and waterproof membrane are often used interchangeably in product listings, but they do not always describe the same performance. A sheet may slow vapor movement without stopping liquid water, while a liquid-applied system may be designed for a different installation method and a different range of concrete moisture conditions.
The purpose of the barrier is to help protect the flooring system from moisture-related problems such as swelling, cupping, warping, adhesive failure, staining, or deterioration. It does not replace proper subfloor preparation and it cannot solve an active leak, groundwater problem, or hydrostatic pressure.
Where Does a Moisture Barrier Go?
In a typical flooring assembly, the moisture-control layer is placed between the finished floor and the subfloor. Depending on the product, it may be a separate sheet, part of an underlayment, or a coating applied directly to the concrete.
A simplified flooring assembly may look like this:
- Finished flooring
- Approved underlayment or adhesive system
- Separate moisture barrier, if required
- Concrete slab or wood subfloor
- Structural floor assembly
The exact order can change depending on the flooring product and installation method. For example, a floating laminate floor may use an underlayment with an attached vapor barrier, while a glue-down wood or resilient flooring system may require a liquid-applied moisture mitigation product and a compatible adhesive.
Do You Need a Moisture Barrier Under Laminate Flooring?
Laminate flooring is commonly installed as a floating floor, and many products require an underlayment beneath the planks. When laminate is installed over concrete, the underlayment may also provide vapor protection, but the product instructions should confirm whether the barrier is integrated or whether a separate layer is required.
Some laminate products already include an attached pad, while others require a separate underlayment. Adding an extra soft layer without checking the installation instructions can affect the stability of the locking system, the feel of the floor, or the manufacturer’s warranty.
Concrete slabs can release moisture over time even when the surface appears dry. For that reason, the slab should be evaluated before installation, particularly in basements, below-grade rooms, and ground-level spaces.
Mohawk, for example, provides product-specific laminate installation instructions and identifies details such as acclimation and pre-attached pad requirements rather than treating every laminate floor as identical. Mohawk laminate installation instructions
Do You Need a Moisture Barrier Under Vinyl or LVP Flooring?
Vinyl plank and luxury vinyl flooring are often described as water-resistant or waterproof, but that does not automatically mean the entire flooring assembly is protected from moisture coming through the subfloor. The moisture condition of the slab, the installation method, the attached pad, and the product warranty still matter.
Some LVP products are installed directly over a properly prepared subfloor, while others may allow or require a specific underlayment. Shaw’s installation guidance states that not all vinyl floors require underlayment and recommends checking the product-specific installation procedure before adding one. Shaw luxury vinyl installation guidance
If the LVP already has an attached pad, do not automatically add another cushioned underlayment. A separate polyethylene moisture barrier may be permitted in some systems, but this depends on the manufacturer’s instructions and should not be assumed from the product title alone.
Do You Need a Moisture Barrier Under Hardwood Flooring?
Hardwood and engineered wood flooring are more sensitive to moisture changes than many synthetic flooring products. When wood flooring is installed over concrete, the slab should be tested and the selected installation system should be compatible with the flooring, adhesive, and moisture conditions.
Engineered wood may be installed as a floating, glue-down, or nail-down system, and each method can have different requirements. Solid hardwood installed over a concrete slab may require a specially approved system rather than a simple plastic sheet.
A moisture barrier can help reduce the risk of moisture reaching the wood, but it does not eliminate movement caused by changes in indoor humidity. The flooring, adhesive, membrane, and subfloor should be treated as one system.
Moisture Barrier Options for Flooring
Polyethylene Sheet Barriers
Polyethylene film is one of the most recognizable moisture barrier products used beneath flooring. It is relatively simple to handle and can be used in some floating-floor assemblies over concrete when the flooring and underlayment instructions allow it.
A sheet barrier does not provide meaningful cushioning, sound reduction, or subfloor leveling. Its performance also depends on proper installation, including complete coverage, correctly treated seams, and protection from tears or punctures before the flooring is installed.
Underlayment With an Attached Vapor Barrier
Some flooring underlayments combine cushioning, sound reduction, minor surface accommodation, and moisture protection in one product. These systems are often convenient for laminate and some engineered wood installations, but the thickness and compressibility must be suitable for the locking system.
An attached barrier does not automatically make an underlayment compatible with every type of flooring. Always check whether it is approved for laminate, engineered wood, vinyl, or the specific product you plan to install.
Liquid-Applied Moisture Membranes
Liquid-applied membranes are coatings installed directly on the prepared subfloor. They are commonly used in more demanding concrete applications and may be part of a system that includes primer, adhesive, self-leveling underlayment, or other compatible products.
For example, Sika MB is a two-component epoxy moisture barrier designed for use under certain flooring systems, floating floors, and self-leveling underlayments. Its technical information includes specific moisture limits, substrate preparation requirements, permeability data, and ASTM F3010 compliance, which illustrates why liquid systems must be selected and installed according to their own technical documentation. Sika MB technical information
How to Choose the Right Moisture Barrier
The right product is determined by more than the word “waterproof” on the package. Before buying, compare the flooring type, subfloor, installation method, moisture test results, and the manufacturer’s requirements.
| What to compare | Why it matters |
|---|---|
| Flooring type | Laminate, vinyl, hardwood, and engineered wood may have different requirements |
| Subfloor material | Concrete and wood subfloors behave differently |
| Installation method | Floating, glue-down, and nail-down systems use different products |
| Attached pad or barrier | An extra layer may be unnecessary or unsuitable |
| Moisture test limits | The product must be suitable for the measured condition |
| Thickness | Excessive thickness or cushioning can affect floor stability |
| Permeability or perm rating | This describes vapor transmission and is different from thickness |
| Seam and edge treatment | Gaps and damaged areas can compromise the system |
| Adhesive compatibility | Some membranes are designed to work only with certain adhesives |
| Warranty requirements | Incorrect materials may affect the flooring warranty |
What Does 6 Mil Mean?
The term 6 mil refers to the thickness of a plastic film. One mil is one-thousandth of an inch, so 6 mil describes thickness, not how much vapor the material allows to pass through.
A thicker sheet is not automatically the right sheet for every flooring system. Permeability or permeance is a separate performance characteristic, so do not use the thickness alone as proof that a product is suitable for your project.
Thickness and Cushioning Are Not the Same Thing
A moisture barrier sheet may be thin and flexible, while an underlayment may be thicker because it also provides cushioning or sound reduction. The thickest product is not necessarily the best option, particularly under click-lock vinyl or laminate flooring.
Too much cushioning can allow excessive movement beneath the floor. Always follow the maximum thickness and underlayment requirements listed for the specific flooring product.
How to Install a Sheet Moisture Barrier Over Concrete
A sheet barrier should be installed only after the concrete has been evaluated and prepared. The details vary between products, so the instructions supplied with the barrier and the flooring should control the installation.
1. Inspect and Prepare the Concrete
Remove dust, debris, loose material, old adhesive residue, and anything that could damage the barrier or interfere with the flooring system. Repair cracks, low areas, high spots, and other surface problems according to the requirements of the flooring manufacturer.
The barrier is not a substitute for a flat and structurally sound subfloor. If the concrete is uneven, contaminated, or damaged, those problems should be addressed before the moisture-control layer is installed.
2. Test the Moisture Condition
A concrete slab can look dry while still releasing enough moisture to affect flooring. Depending on the flooring system, the required evaluation may involve relative humidity testing, a calcium chloride test, or another method specified by the manufacturer.
Armstrong’s installation documentation, for example, includes guidance on concrete, underlayments, moisture testing, and acceptable limits for resilient flooring. Armstrong F-5061 installation guide
3. Choose the Correct Barrier System
Use a separate sheet, integrated underlayment, liquid membrane, or other system only when it is approved for the flooring and subfloor combination. This is also the point where you should confirm whether the installation is floating, glue-down, nail-down, or another method.
If the concrete moisture level exceeds the flooring manufacturer’s limit, do not simply cover the slab with a generic sheet and continue. A higher-performance moisture mitigation system may be required, or the source of the moisture may need to be corrected first.
4. Lay Out the Sheet Carefully
Roll out the sheet so that the intended area is covered without unnecessary folds, gaps, or exposed sections. Avoid dragging sharp tools or heavy materials across the barrier, because small tears can compromise the finished assembly.
The correct overlap, seam direction, edge treatment, and wall detail depend on the product instructions. Do not assume that one overlap measurement applies to every barrier or flooring system.
5. Treat Seams, Edges, and Penetrations
Seams should be treated with the tape or sealing method specified by the manufacturer. Edges around walls, columns, door openings, pipes, and other penetrations may require additional treatment depending on the system.
A barrier with open seams or unsealed penetrations may not provide the protection promised by the product. The goal is a complete and continuous installation before the flooring covers the work.
6. Inspect Before Covering the Barrier
Walk the installation area and check for tears, punctures, open seams, folds, and exposed sections. Once the finished flooring is installed, these problems become difficult to locate and repair.
The final inspection is also the last opportunity to confirm that the floor, barrier, underlayment, adhesive, and installation method are compatible. If anything is uncertain, stop before covering the subfloor.
When a Sheet Barrier Is Not Enough
A plastic sheet can help control vapor migration, but it is not a complete waterproofing solution. It should not be used to hide active leaks, standing water, groundwater intrusion, hydrostatic pressure, or a concrete slab that has not been properly prepared.
A different solution may be needed when:
- the slab has active water intrusion;
- moisture levels exceed the flooring system’s limits;
- the floor will be installed with adhesive;
- the flooring manufacturer requires a liquid-applied membrane;
- the concrete needs leveling, repair, or surface preparation;
- the product already includes an attached pad or barrier;
- the subfloor is wood rather than concrete.
In more demanding installations, the correct approach may involve moisture testing, mechanical surface preparation, a liquid membrane, a compatible adhesive, and a controlled curing process. These systems are not interchangeable with a basic sheet barrier.
Common Moisture Barrier Mistakes
Assuming Every Concrete Floor Needs the Same Product
Concrete is a common source of subfloor moisture, but flooring systems have different requirements. The correct solution for floating laminate may not be appropriate for glue-down vinyl or engineered hardwood.
Choosing by Thickness Alone
A 6-mil sheet may be appropriate for one system and unsuitable for another. Thickness describes one physical property, while permeability, durability, seam treatment, and compatibility determine how the complete system performs.
Adding Extra Underlayment Under LVP
An extra cushioned layer can create movement beneath click-lock vinyl and may conflict with the flooring warranty. Check whether the product already has an attached pad and whether a separate barrier or underlayment is permitted.
Treating a Barrier as a Waterproofing Repair
A barrier can help control moisture vapor, but it does not repair a plumbing leak or stop water entering through the slab. Moisture problems should be diagnosed before flooring is installed.
Ignoring the Manufacturer’s Instructions
General advice is useful for understanding the topic, but the flooring manufacturer’s instructions control the actual installation. Shaw, Armstrong, Mohawk, and other manufacturers publish different requirements for different products and installation methods.
How to Shop for a Moisture Barrier
When comparing products online, start with the flooring and subfloor rather than the product name. A product described as a “vapor barrier” may be designed for laminate, wood, vinyl, crawl spaces, walls, or another application entirely.
Look for the following information in the product documentation:
- approved flooring types;
- approved subfloor materials;
- floating or glue-down compatibility;
- thickness and compressibility;
- vapor permeance or perm rating;
- moisture test limits;
- required tape or seam treatment;
- coverage and roll dimensions;
- installation instructions;
- warranty requirements.
If the listing does not clearly explain where the product can be installed, do not assume that it is suitable under your flooring. A lower-priced product can become expensive if it causes movement, adhesive failure, swelling, or a failed installation.
Frequently asked questions
Do I need a moisture barrier under flooring on concrete?
Should I put plastic under vinyl flooring?
Can I use 6-mil plastic under laminate flooring?
Is a moisture barrier the same as underlayment?
Do I need a vapor barrier under hardwood flooring?
Can a moisture barrier fix a wet basement floor?
Final Checklist
Before installing a moisture barrier for flooring, confirm the following:
- The subfloor material has been identified.
- The flooring type and installation method are known.
- The concrete has been tested when required.
- The flooring instructions allow the selected barrier or underlayment.
- Any attached pad or barrier has been taken into account.
- Thickness and compressibility are within the flooring requirements.
- Permeability information has been checked when relevant.
- Seams, edges, and penetrations will be treated correctly.
- The product is not being used to hide an active water problem.
- The complete flooring system is compatible before installation begins.
The best moisture barrier for flooring is not simply the thickest plastic or the product with the strongest marketing claim. It is the barrier or moisture-control system that matches the subfloor, flooring, installation method, measured moisture condition, and manufacturer’s requirements.
For most projects, the safest process is to test the subfloor first, choose a compatible system, prepare the surface properly, and follow the flooring instructions before covering the floor.