
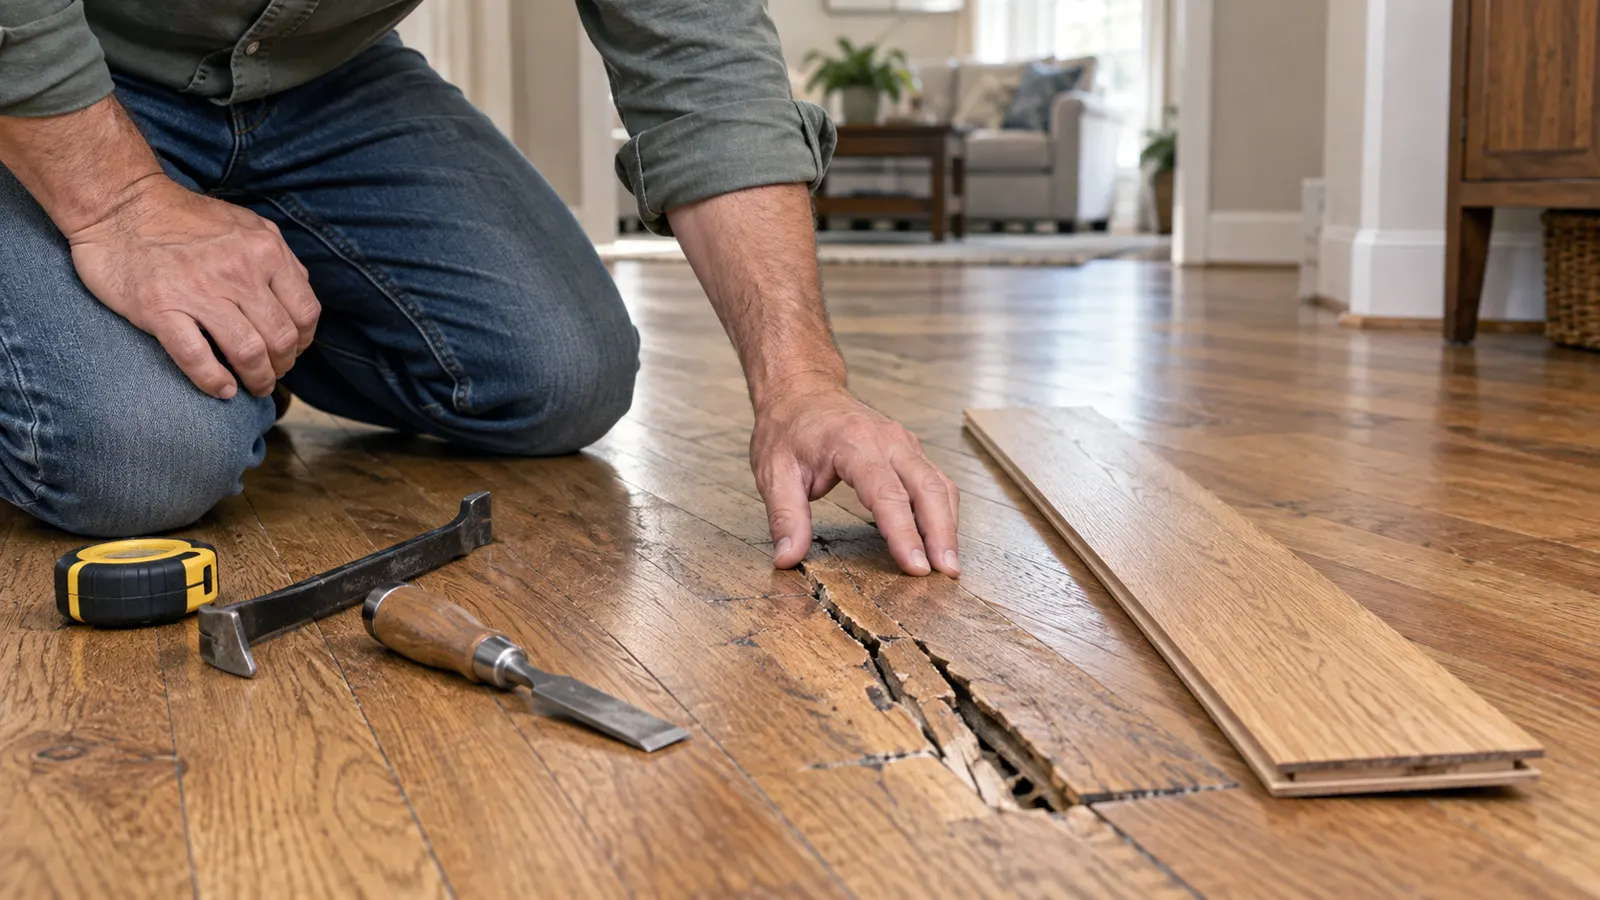
Repairing wooden floorboards is not simply a matter of filling the visible damage. A chipped, cracked, loose, or lifting board may have a cosmetic problem, but it can also point to movement in the floor system, moisture below the surface, or a damaged subfloor. A good wooden floor repair starts by separating those possibilities.
The good news is that one damaged board does not automatically mean replacing the entire floor. The right approach is to identify what has failed, choose the least invasive repair that can actually solve it, and stop before a quick cosmetic fix creates a larger problem.
Repair or Replace? Start With the Way the Board Behaves
Look at the board, but also pay attention to what happens when you walk over it. A stable board with a small area of missing wood is a very different repair from a board that moves, creaks, lifts, or has swollen edges.
| What you see or feel | What it may mean | Usually the right direction |
|---|---|---|
| A surface scratch or scuff with no missing wood | Damage may be limited to the finish | Use our guide on how to repair scratches on hardwood floors rather than treating the damage as a board problem. |
| A small dent, chip, or gouge on a stable board | Local wood loss, but no sign of movement or moisture | Filler, hard wax, or a small wood patch followed by careful color and finish matching |
| A board moves or creaks but is not split | Loose fixing, a gap below the board, or movement in the subfloor | Find the source first; secure the board only when the floor construction and anything below it are understood |
| A board is split or cracked through its working area | The board may no longer be structurally reliable | Replace the board or the damaged section, depending on the installation |
| A board is swollen, warped, cupped, or lifting | Moisture, expansion pressure, delamination, or an installation problem | Stop cosmetic repairs and find the underlying cause before replacing anything |
| Several boards move or show similar damage | The issue may be wider than one board | Have the floor and subfloor assessed before making local repairs |
This is why the cheapest-looking solution is not always the least expensive one. Filler can improve the appearance of a stable board, but it cannot stop movement, replace missing support, or solve moisture damage. For cracked floorboards, that distinction matters even more because a visible crack may be the symptom of a board that is no longer stable.
Check the Flooring System and the Cause Before You Cut
Before repairing or removing a board, establish what type of floor you have. Solid hardwood is made from one piece of wood and can generally be refinished more times than engineered flooring, which has a real-wood wear layer over a layered core. That wear layer and the construction of the plank determine how much local sanding, repair, or refinishing is realistic. The National Wood Flooring Association’s overview of solid and engineered wood floors is a useful reference for this distinction.
Also check whether the floor is site-finished or prefinished, and whether the boards appear to be nailed, glued, or installed with a click system. Prefinished boards can have a hard factory coating and beveled edges that make a local repair more visible, while a site-finished floor may allow a different repair approach. Do not assume that a method suitable for one construction will work on another.
Next, look for evidence of the original problem. Dark staining, raised edges, cupping, a soft or spongy feel, and damage near a sink, dishwasher, exterior door, radiator, or plumbing wall deserve more attention than the visible chip or crack. If the floor is above a basement or crawlspace, inspecting from below can help show whether the board is separating from the subfloor or joist.
Before drilling, nailing, cutting, or lifting a board, consider what may be underneath it. Plumbing, electrical wiring, radiant heating, and other concealed services can turn a straightforward repair into a dangerous one. If you cannot establish where the support and services are, the sensible repair decision is to stop and get the floor assessed.
Repair a Stable Board: Filler, Patch, or Local Finish
For a small chip or gouge on a board that is dry, firmly fixed, and otherwise sound, a localized repair may be enough. Clean the area without saturating the floor, remove only loose fibers, and make sure the damaged spot is dry and free from wax, dirt, and residue from an earlier repair. The repair material must be compatible with the existing finish, and the manufacturer’s instructions should control its application and curing time.
Small areas of missing material can sometimes be filled in layers with a suitable wood filler or hard wax. The aim is to restore the missing volume without spreading material over a large area of sound finish. Once the repair has cured, it may need to be leveled carefully and then colored to match the surrounding wood rather than simply covered with one dark color.
That is the simplest form of patching floorboards, but it is not the only one. If a stable board has a larger, clearly defined area of missing wood, a skilled repairer may use a wood patch or inlay that follows the grain and sits within the damaged area. This can look more convincing than a thick layer of filler, but the cut, fit, grain direction, and finish all have to be controlled. A poorly fitted patch can become a more obvious feature than the original damage.
If the damage is mainly in the surface coating, the repair may involve cleaning and a compatible local finish rather than removing more wood. Avoid sanding widely around a small repair simply to make the new area look uniform. That can create a dull halo or a lower patch that is more visible than the original chip.
Filler, wax, and local finish are appearance repairs. They should not be used to stabilize a board that moves, close a gap caused by seasonal movement, or hide swelling and lifting. If the board is not stable, solve that problem before working on its color or surface.
Fix a Loose or Creaky Floorboard Without Hiding the Problem
A loose or creaky floorboard may be in good condition but no longer firmly attached to the support below. The sound can come from movement between the board and subfloor, between the subfloor and joist, or around an old fixing. Walking slowly across the area and watching for movement can help locate the board, but it does not by itself identify the cause.
If the board is sound and the problem is a failed fixing, it may be possible to secure it again using a compatible fixing method. The exact choice depends on the installation, the position of the joists, the thickness of the flooring, and whether the floor can be inspected from below. Do not drive a screw or nail blindly into a finished floor; first check for pipes, cables, radiant heating, and adequate support.
When access from below is available, the repair may involve correcting a gap between the subfloor and joist or reinforcing the support. When the movement comes from a damaged subfloor, a joist problem, widespread shrinkage, or moisture-related distortion, securing the top board alone only masks the symptom. A board that is lifting or repeatedly moving needs a cause-based repair, not more filler or surface fasteners.
Replace a Board or a Damaged Section
Replacement is more appropriate when the board is broken, split through its working area, badly warped, rotten, or missing too much material to make a stable patch. It may be possible to replace a single board, but the work depends on how the floor was installed and where the damaged board sits. A board at the edge of a room is usually approached differently from one locked between surrounding tongue-and-groove boards.
Sometimes replacing only a section of hardwood floor is more practical than removing the entire board. This can make sense when the damage is limited to one end, when the rest of the board is sound, or when the board continues beneath a wall, cabinet, or other fixed element. The cut ends still need proper support and fastening, however, and a section should not be left resting on an unsupported edge. The correct method depends on the floor system and the support below it; there is no universal cutting pattern for replacing floorboards.
Before cutting, mark the damaged area and plan how the replacement will be removed without damaging the neighboring boards or the subfloor. Confirm the location of joists and concealed services, and think through how the replacement will be fitted before making the first cut. With glued, floating, click, or unusual tongue-and-groove floors, the safest method may not be the same as the method used for a traditionally nailed solid-wood floor.
After the damaged material is removed, inspect the opening rather than immediately installing the new piece. Remove debris and failed adhesive where appropriate, check that the base is dry and stable, and correct any underlying support or moisture problem first. A new board installed over a defective subfloor may look acceptable briefly, but the movement or damage will return.
The replacement must match more than the color. Compare species, width, thickness, profile, grain direction, finish, and the way the surrounding boards have aged. A new plank from the same species can still look too light, too clean, too glossy, or too uniform beside an older floor.
If possible, use a spare board from the original installation or a piece from a less visible area, but test the proposed color and finish before committing to the repair. Sunlight, cleaning, traffic, previous refinishing, and changes in finish can alter the surrounding boards, so a new piece may be technically correct while still looking different. In some cases, blending a larger area or refinishing the surrounding section produces a more consistent result than trying to make one new board look artificially old.
Do not force a replacement board into a tight opening or block the floor’s intended movement at the perimeter. Tongue-and-groove adjustments, adhesives, nails, and finishing details should follow the original floor system or the manufacturer’s guidance. If the method is unclear, the board is prefinished, the floor is glued down, or radiant heating is present, this is a sensible point to use a hardwood flooring professional.
The realistic goal is a stable, durable repair that becomes unobtrusive in normal use. “Invisible” is not a promise that can be made before the flooring system, damage, and finish have been examined.
When to Stop DIY Floorboard Repair
DIY repair is most reasonable when the damage is localized, the board is stable, the cause is understood, and the repair method is compatible with the floor. Stop before cutting or fastening if you find active moisture, rot, delamination, significant movement, a lifted or swollen board, an unstable subfloor, multiple affected boards, or unknown services beneath the floor.
Engineered flooring also deserves extra caution because aggressive sanding or an unsuitable repair can damage its wear layer. A hardwood flooring professional should assess the floor when the repair affects support, moisture, radiant heating, a large section, or a finish that cannot be matched confidently.
The important distinction is simple: cosmetic damage can often be repaired locally, but structural movement and moisture-related damage must be corrected at the source. That is what determines whether a floorboard repair lasts or only hides the problem for a short time.
Frequently Asked Questions
Can a cracked hardwood floorboard be repaired?
A small, stable crack may sometimes be filled or patched, but a board split through its working area is often a replacement or professional-assessment issue. If the crack is accompanied by movement, swelling, or moisture staining, do not treat it as a simple surface defect.
Can you replace just one hardwood floorboard?
Often, yes, but the practical method depends on the installation system, the board’s position, access to the subfloor, and the condition of the surrounding floor. A single-board replacement is not automatically a simple job when the board is glued, locked into tongue-and-groove flooring, or located above concealed services.
What is the difference between repairing and replacing a floorboard?
Repair keeps the existing board and restores a stable area of missing wood or damaged finish. Replacement removes the board or a section of it because the original material is no longer stable, too badly damaged, or affected by a problem that a surface repair cannot solve.
Why does a replacement board look different from the rest of the floor?
Wood changes with age, sunlight, traffic, cleaning, and finish wear. Matching species and dimensions is necessary, but it may not be enough to match the color, grain character, and sheen of an older floor.